How to set up synchronization with SFTP-server
In the stand-alone mode @MAX SyncUp allows synchronizing the folders saved on your computer with the folders kept on removable drives, networked PCs or NAS, on FTP, SFTP or WebDAV-servers or on Google Drive.
Let's say, for instance, you need to keep the same collection of photos on your personal laptop and the server of your company that you have access through SFTP.
To synchronize files and folders, follow the steps below:
-
Run the program.
-
On the toolbar click the New profile button

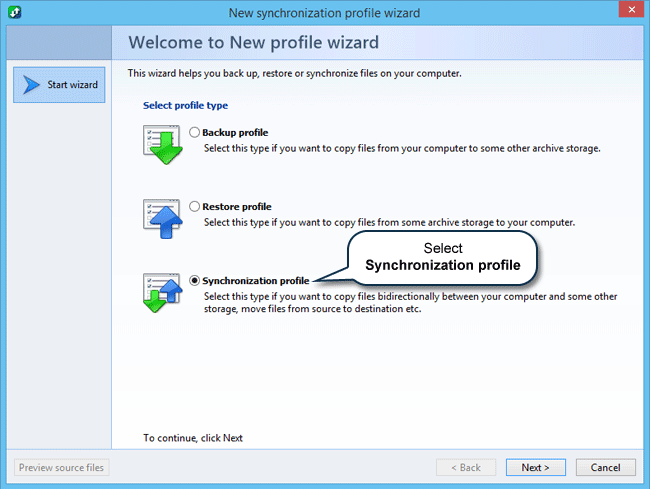
This opens the New profile wizard. The first tab lets you select the profile type.
-
Select Synchronization profile and then click Next.
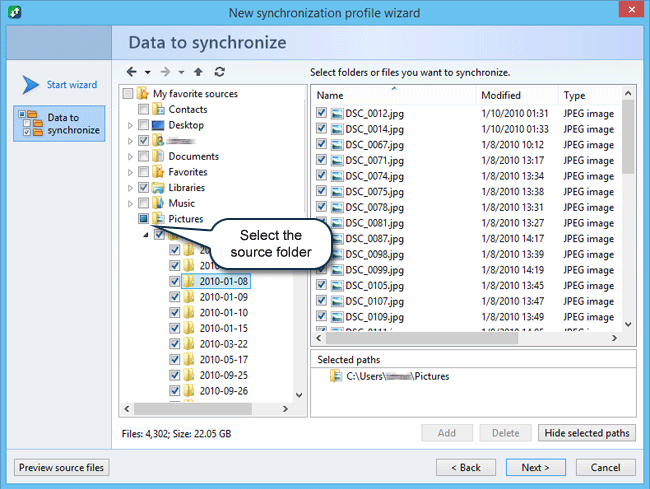
This opens the next tab where you need to select the source folder with the files you want to synchronize.
-
In the folder tree select Pictures as the source folder and then click Next.
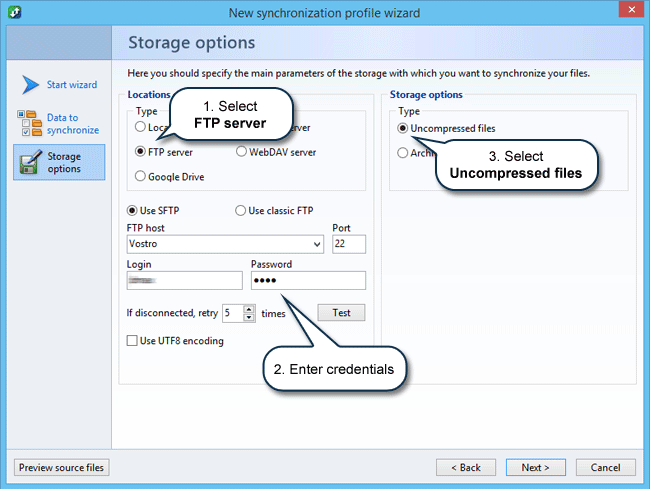
The next tab allows you to select options for the destination.
-
Select FTP server, enter FTP settings and credentials, select Uncompressed files and then click Next.
This opens the tab where you must select the target folder for syncing files.
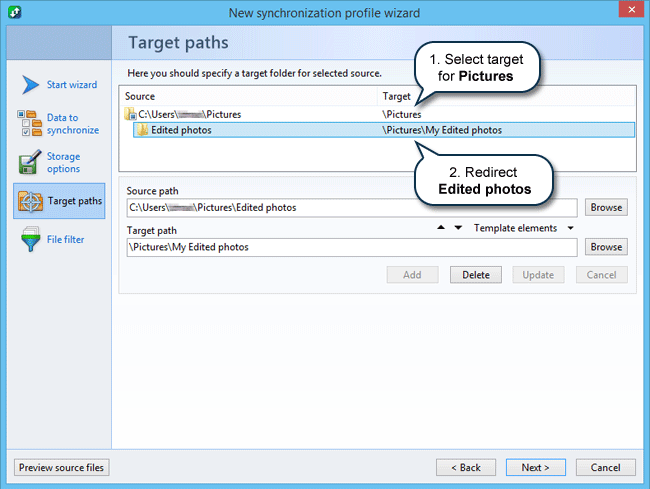
Let's suppose you need to synchronize the subfolder Edited Photos on your PC with the subfolder My Edited Photos on your company server.
-
Select the target folder for the Pictures and then redirect the Edited photos to the My edited photos (enter path for the Edited photos into the Source path field, then enter path for the My edited photos on the server into the Target path field and then click Add). Then click Next.
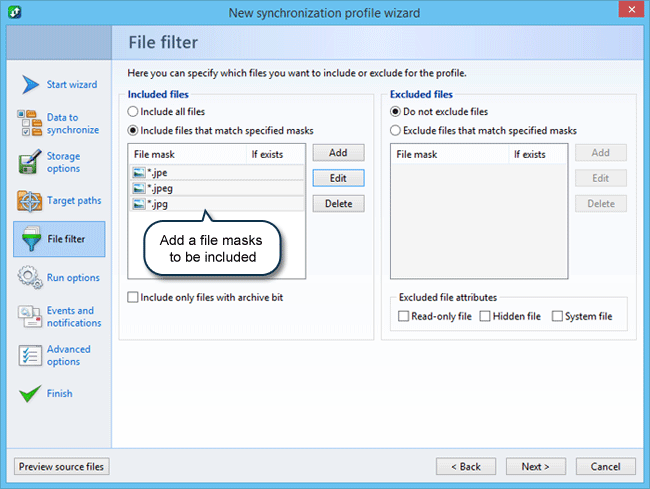
This opens the tab where you can add filters to include (or exclude) certain types of files into the synchronization process.
-
Add the mask *.jpg to include only JPG files and then click Next.
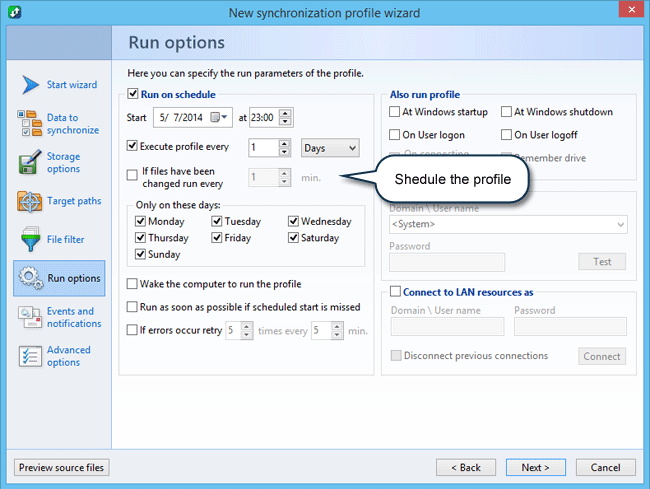
This opens the tab where you can specify the profile launch options. Here you can schedule the time and frequency to run the profile, select an event to trigger the profile execution, as well as set other profile execution options.
-
Schedule the profile and then click Next.
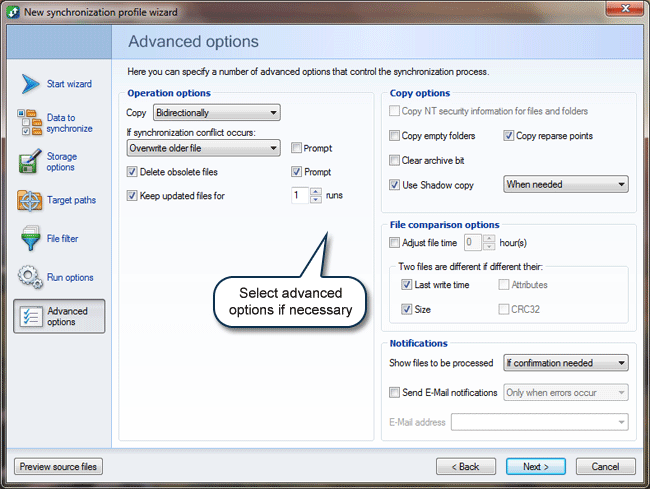
This opens the tab where you can specify advanced options for the profile.
-
Select advanced options (if necessary) and then click Next.
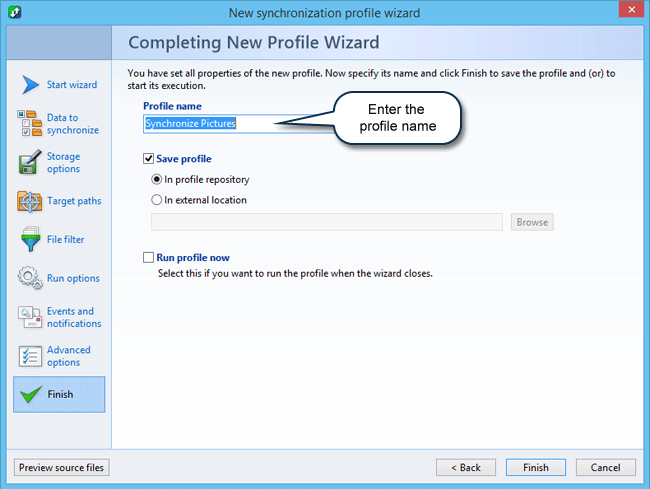
This opens the tab where you can enter the name of the profile.
-
Enter the name of the profile and then click Next.
Once the profile is created, you can see it on the main window.
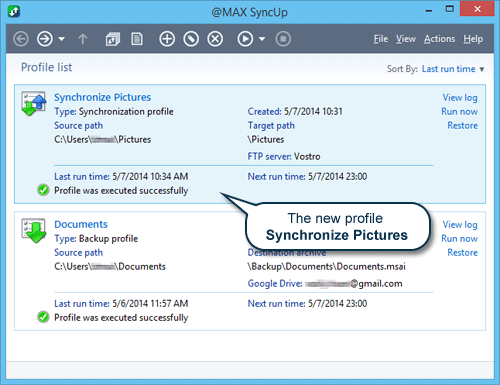
The program synchronizes files at scheduled time automatically.
Also you can run the profile manually by clicking the Execute profile button


