How to back up files to the networked computer or NAS
To back up files to a networked computer or NAS is a classical way to secure your important data against their loss in case of any troubles with your computer. Really the probability that both the disks will fail simultaneously is not great that’s why we can say your data are protected reliably. Backups of files can be created as compressed (and encrypted if necessary) archives or as uncompressed copies of the original files. @MAX SyncUp allows setting up both the variants.
Let's say, for example, you want the program to create a daily backup of your documents and save it on the shared network resource in your local network. The backup should be incremental which means the program must be set to copy only those files that have been created or changed since the last backup.
To back up files, follow the steps below:
-
Run the program.
-
On the toolbar click the New profile button

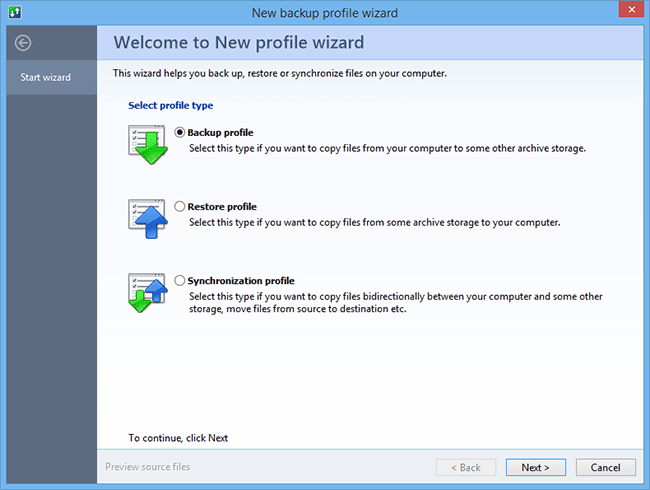
This opens the New profile wizard. The first tab lets you select the profile type.
-
Select Backup profile, and then click Next.
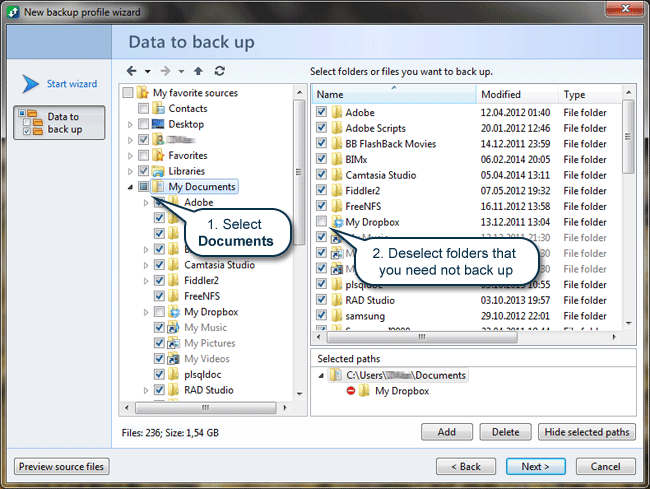
This opens the next tab where you need to select the source folder with the files you want to back up.
-
In the folder tree select Documents as the source folder and deselect the subfolders that you do not need to back up. Then click Next.
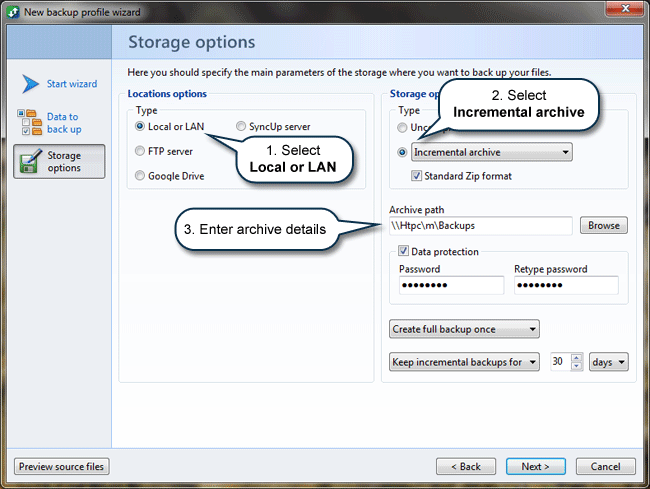
This opens the next tab where you can configure the storage.
-
5. Select Local or LAN, check the Storage type as Incremental archive and specify the path to the place in the local network where your backups to be saved. Optionally you can specify a password and set up using of standard Zip format for the created archives. Also you can assign the depth of incremental archive keeping and the parameters of full archive creating. Then click Next.
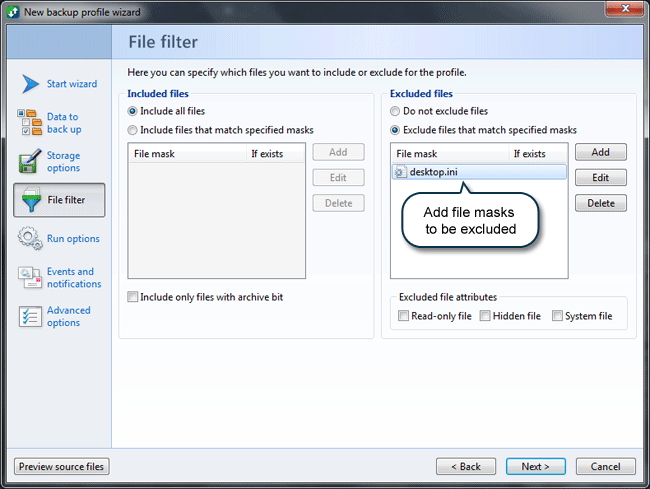
This opens the tab where you can add filters to include (or exclude) certain types of files into the backup process.
-
Add file masks to be excluded and then click Next.
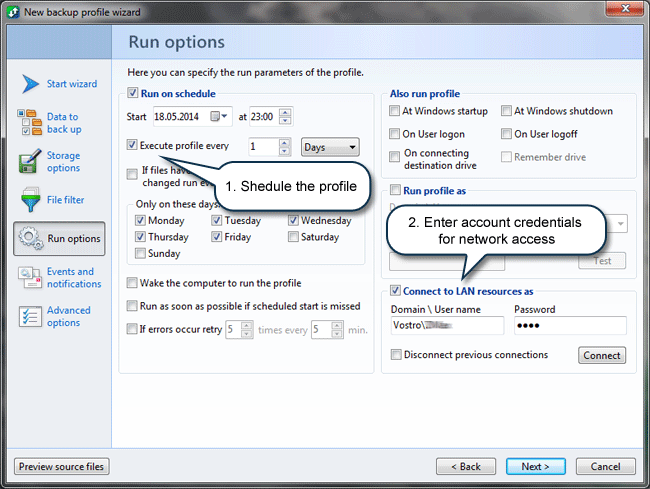
This opens the tab where you can specify the profile run options. Here you can schedule the time and frequency to run the profile, select an event to trigger the profile execution and set other profile execution options.
-
Schedule the profile.
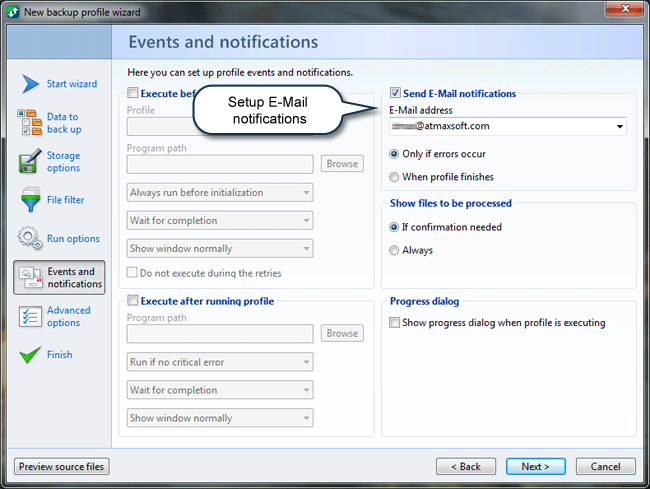
Note that a profile is executed under the system account by default. This makes sure that the access rights will be available to copy any files. Simultaneously the programs executed under the system account do not have the access to the local network. To solve this problem the access to the network resources is realized under the current interactive user. If it is not desirable for any reasons or it is proposed to use the programs on the server when the interactive user is not in the system, it is necessary to specify plainly the credentials for the network access. In that case check the Connect to LAN resources as option and enter the user name and the password. In a different way you can set up the profile executing under the account of the user that has the access to the network. For that select Run profile as and enter the proper credentials. Note, this user should have the rights which sufficient for the file copying. Then click Next.On the next tab you can set up the other program run before or after the profile executing, notifications about profile executing by e-mail and others.
-
Let’s say you want to set up the sending of e-mail notifications if errors are occurred when executing the profile. For that check the Send E-mail notifications option and enter the e-mail on which you want to receive the notifications. Then click Next.
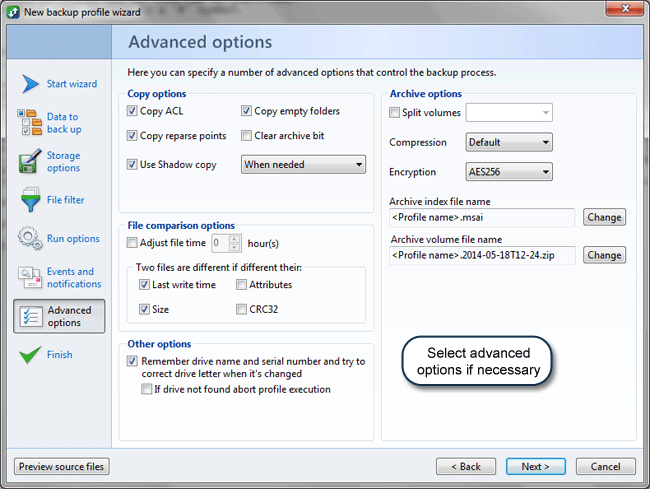
This opens the tab where you can specify advanced options of the profile.
-
Select advanced options (if necessary), and then click Next.
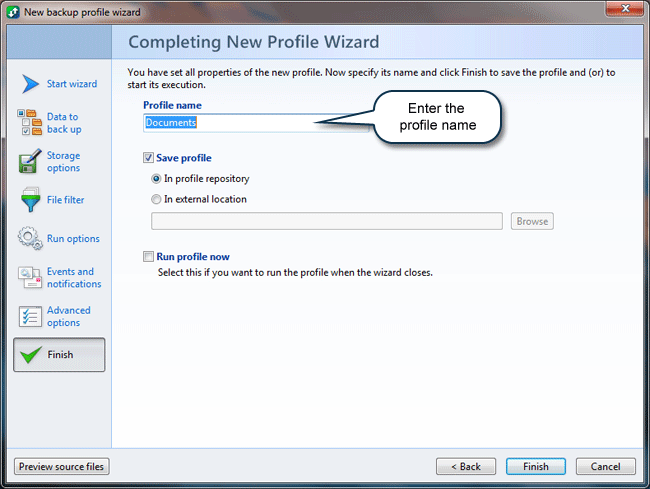
This opens the tab where you should enter the name of the profile.
-
Enter the name of the profile and then click Finish.
Once the profile is created, you can see it on the main window.
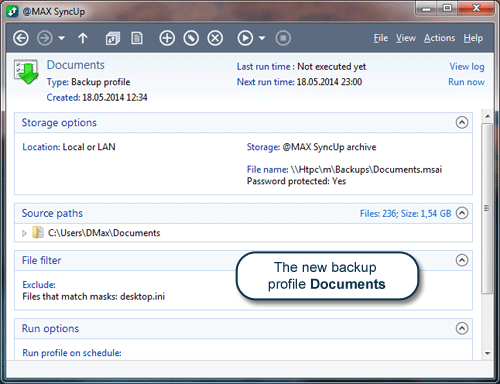
The program will create backups automatically on schedule.
Also you can run the profile manually by clicking the Execute profile button


